独り言
ウェブサーバー(Apache)にSSLを設定する
今回は、ウェブサーバーにSSL通信で接続できるように設定を追加します。
※ここでは、開発環境を前提としてSSLの設定を進めます。外部に公開するサーバーに設定する場合は、追加のセキュリティー設定をしてください。
-
OpenSSL で自己認証局を構築する。
openssl がインストールされているかバージョンを確認します。
[root@localhost ~]# openssl version
OpenSSL 1.0.2k-fips  26 Jan 2017

ヴァージョン表示がされればインストールされています。
インストールされていなければインストールします。
[root@localhost ~]# yum -y install openssl-devel
CentOS7 では、既に /etc/pki/CA に必要なディレクトリー展開がされています。今回は、開発環境ですので作成されているディレクトリーを使用して設定をしていきます。
ディレクトリーを移動します。
[root@localhost ~]# cd /etc/pki/CA

シリアルを初期化します。
[root@localhost CA]# echo "01" > ./serial

証明書データベースを初期化します。
[root@localhost CA]# touch ./index.txt

自己認証局の証明書と秘密鍵を作成します。ここでは -days 1850 = 5年の期限の証明書です。
[root@localhost CA]# openssl req -new -x509 -newkey rsa:2048 -out ca.cert -keyout private/ca.key -days 1825
Generating a 2048 bit RSA private key
....................................+++
...........................+++
writing new private key to 'private/ca.key'
ca.key のパスワードを入力します。証明書発行時に必要ですのでメモしておいてください。
黄色文字は、ご自分の環境に合わせて変更してください。
Enter PEM pass phrase: your password
Verifying - Enter PEM pass phrase: your password
-----
You are about to be asked to enter information that will be incorporated
into your certificate request.
What you are about to enter is what is called a Distinguished Name or a DN.
There are quite a few fields but you can leave some blank
For some fields there will be a default value,
If you enter '.', the field will be left blank.
-----
Country Name (2 letter code) [XX]:JP
State or Province Name (full name) []:Tokyo
Locality Name (eg, city) [Default City]:Chiyoda-ku
Organization Name (eg, company) [Default Company Ltd]:SPS-KATOH
Organizational Unit Name (eg, section) []:
Common Name (eg, your name or your server's hostname) []:ca.exapmle.localhost
Email Address []:webmaster.example.localhost

証明書を確認するには、以下のコマンドを実行します。
[root@localhost CA]#  openssl x509 -in ca.cert -text
これで自己認証局用の証明書が作成できました。引き続き、サーバー用の証明書を作成します。
その前に、/etc/pki/tls/openssl.cnf を以下の様に修正しておきます。policy_match セクションを修正します。この修正は、サーバー証明書に署名をするときにorganizationName の不整合エラーを回避する為の設定です。 [ policy_match ]
organizationName = match<= matchをoptionalにします。 organizationName = optional user_cert セクションに設定を追加します。これ以降の設定は、chrome や Firefox でSANに関するエラーを回避する為の設定です。 subjectAltName=@alt_names <=追加 v3_req に設定を追加します。 subjectAltName=@alt_names <=追加 alt_names セクションを追加します。 DNS.~は、必要に応じて追加して下さい。 [alt_names] DNS.1=ca.example.localhost DNS.2=example.localhost新たなcommon name で証明書に署名するときは、DNS~を追加してください。
-
証明書を作成する。
開発サイト用の証明書を作成します。複数のバーチャルホストを設定する前提でサーバーの秘密鍵を共有していく為に、今回、秘密鍵と申請書(CSR)を別々に作成していきます。
/etc/httpd に移動し、ssl ssl/example.localhost ssl/server-keyの3つのディレックトリーを作成します。
[root@localhost CA]# cd /etc/httpd
[root@localhost httpd]#  mkdir ./ssl ./ssl/example.localhost ./ssl/server-key

認証局への署名要求書(CSR,申請書)を作成します。
1.サーバー用の共通キーを作成します。
[root@localhost httpd]cd ssl
[root@localhost ssl]# openssl genrsa -des3 -out ./server-key/server.key 2048
Generating RSA private key, 2048 bit long modulus
.............................................................................................................+++
............+++
e is 65537 (0x10001)
Enter pass phrase for ./server-key/server.key:パスワードを入力
Verifying - Enter pass phrase for ./server-key/server.key:確認用のパスワードを入力

2.このままでは、server.key が呼ばれる度にパスワードを聞かれます。煩雑さを回避する為にパスワードを削除します。
[root@localhost ssl]# openssl rsa -in ./server-key/server.key -out ./server-key/server.key
Enter pass phrase for server.key:秘密鍵作成時のパスワードを入力します。
writing RSA key

3.CSRを作成します。
[root@localhost ssl]# openssl req -new -days 1825 -key ./server-key/server.key -out ./example.localhost/example.localhost.csr
You are about to be asked to enter information that will be incorporated
into your certificate request.
What you are about to enter is what is called a Distinguished Name or a DN.
There are quite a few fields but you can leave some blank
For some fields there will be a default value,
If you enter '.', the field will be left blank.
-----
Country Name (2 letter code) [XX]:JP
State or Province Name (full name) []:Tokyo
Locality Name (eg, city) [Default City]:Chiyoda-ku
Organization Name (eg, company) [Default Company Ltd]:そのままEnter
Organizational Unit Name (eg, section) []:そのままEnter
Common Name (eg, your name or your server's hostname) []:exsample.localhost
Email Address []:そのままEnter
Please enter the following 'extra' attributes
to be sent with your certificate request
A challenge password []:そのままEnter
An optional company name []:そのままEnter

CSRの内容は、以下のコマンドで確認できます。
[root@localhost ssl]# openssl req -in ./example.localhost/example.localhost.csr -text
example.localhost の証明書発行用のCSR ができました。自己認証局で証明書を発行します。
ディレクトリーを移動します。
[root@localhost ssl]# cd /etc/pki/CA

証明書に署名します。
[root@localhost ssl]#  openssl ca -in /etc/httpd/ssl/example.localhost/example.localhost.csr -keyfile ./private/ca.key -cert ./ca.cert -out /etc/httpd/ssl/example.localhost/example.localhost.cert
Using configuration from /etc/pki/tls/openssl.cnf
Enter pass phrase for ./private/ca.key: <=認証局作成時のパスワードを入力します。
Check that the request matches the signature
Signature ok
Certificate Details:
        Serial Number: 1 (0x1)
        Validity
            Not Before: Jan 28 06:52:07 2018 GMT
            Not After : Jan 28 06:52:07 2019 GMT
        Subject:
            countryName               = JP
            stateOrProvinceName       = Tokyo
            organizationName          = Default Company Ltd
            commonName                = example.localhost
        X509v3 extensions:
            X509v3 Basic Constraints:
                CA:FALSE
            Netscape Comment:
                OpenSSL Generated Certificate
            X509v3 Subject Key Identifier:
                6B:40:18:A0:EF:DB:A6:FF:3D:5B:D5:24:C4:0F:1F:5A:13:B4:8B:C8
            X509v3 Authority Key Identifier:
                keyid:AD:9B:60:BC:E2:72:53:30:74:3C:D3:3C:D9:6C:78:32:AD:E6:42:F3

Certificate is to be certified until Jan 28 06:52:07 2019 GMT (365 days)
Sign the certificate? [y/n]:y


1 out of 1 certificate requests certified, commit? [y/n]y
Write out database with 1 new entries
Data Base Updated
これで、/etc/httpd/ssl/example.localhost 内に example.localhost.cert という証明書ができています。
-
証明書をウェブサーバーにインストールする。
「/etc/httpd/vhosts.d/example.localhost.conf」に以下の内容を追記します。
<VirtualHost *:443>
    ServerName      example.localhost
    DocumentRoot    /media/sf_WebWork/example.localhost/httpdocs
    ServerAdmin     webmaster@example.localhost
    CustomLog       /media/sf_WebWork/example.localhost/logs/access_log \
		      "%t %h %{SSL_PROTOCOL}x %{SSL_CIPHER}x \"%r\" %b"
    ErrorLog        /media/sf_WebWork/example.localhost/logs/error_log
    SSLEngine on
    SSLProtocol all -SSLv2
    SSLCipherSuite HIGH:MEDIUM:!aNULL:!MD5:!SEED:!IDEA
    SSLCertificateFile /etc/httpd/ssl/example.localhost/example.localhost.cert
    SSLCertificateKeyFile /etc/httpd/ssl/server-key/server.key
    <Files ~ "\.(cgi|shtml|phtml|php3?)$">
        SSLOptions +StdEnvVars
    </Files>
    BrowserMatch "MSIE [2-5]" \
        nokeepalive ssl-unclean-shutdown \
        downgrade-1.0 force-response-1.0
    <Directory "/media/sf_WebWork/example.localhost/httpdocs">
        Require all granted
        AllowOverride AuthConfig FileInfo
        Options FollowSymlinks Includes
    </Directory>
</VirtualHost>
サーバーの設定を確認します。
[root@localhost ssl]# apachectl -t
Syntax OK

エラーが表示された場合は、内容を確認して修正します。
サーバーを再起動します。
[root@localhost ssl]# systemctl restart httpd
サーバーが再起動したら、「https://example.localhost」で接続してみましょう
自己認証局を信頼されたルート証明機関に追加する。
FireFox等のブラウザでは信頼できないサイトとしてページを開けなくなります。これを回避するために作成した自己認証局を信頼されたルート証明機関に加えます。
-
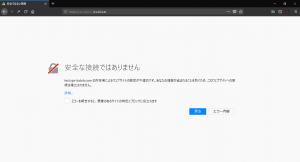
ssl接続をしたところ、左のようなエラーが面が表示されました。このまま例外を追加する事も出来ますが、毎回例外を追加するのも問答臭いので、信頼されたルート機関に追加します。
自己認証局の証明書を、ブラウザが読み込める形式に変換します。
[root@localhost ssl]# cd /etc/pki/CA
[root@localhost CA]# openssl x509 -inform pem -in ./ca.cert -outform der -out ./ca.der

ローカルにダウンロードできる場所にコピーします。
[root@localhost CA]cp ./ca.der /media/sf_WebWork/ca.der
windowsで共有したフォルダー「WebWork」にca.der がコピーされています。ファイルをダブルクリックしてください。
-

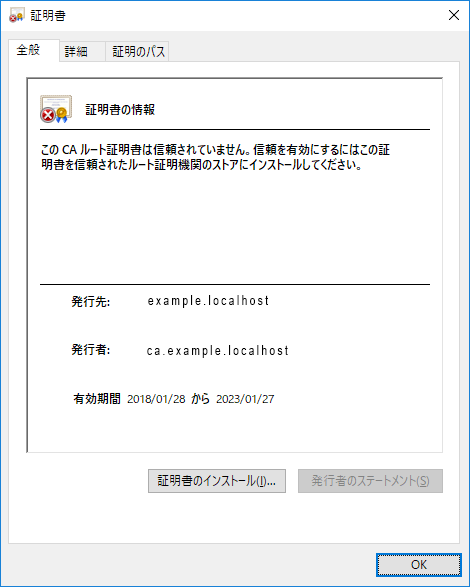
証明書のインストールをクリックします。
-
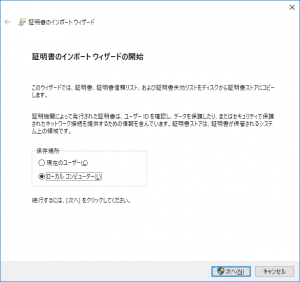
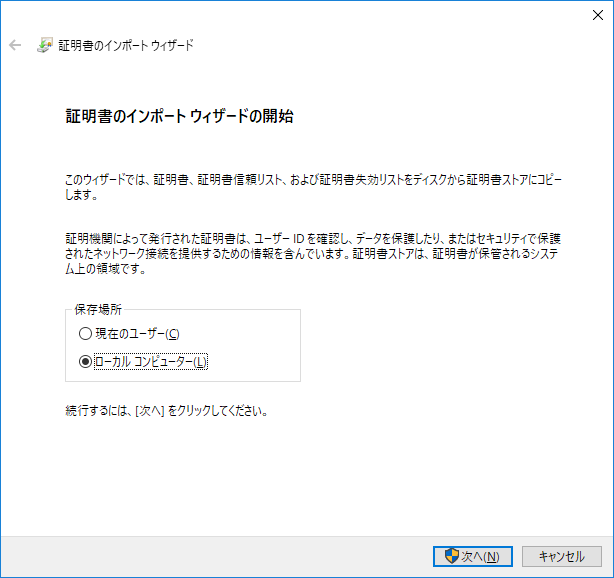
保存場所を聞かれますので、「ローカルコンピューター」を選択して「次へ」をクリックします。
-

証明書ストアを聞かれますので、「証明書をすべて次のストアに配置する」を選択し、「参照」をクリックします。
-
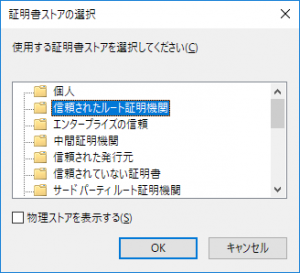
「信頼されたルート証明書」を選択して「OK」をクリックします。
-
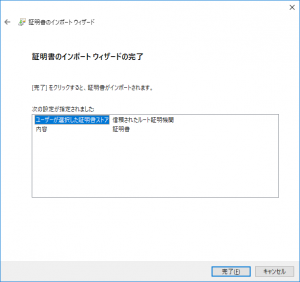
「完了」ボタンをクリックして証明書の作業は終了です。
Firefox への証明書のインポートはこちらをご覧ください。
再度ブラウザで接続し、問題なく接続できる事を確認してください。